To get started with iTimekeep, we suggest familiarizing yourself with the user interface and core functionality.
User Interface Overview
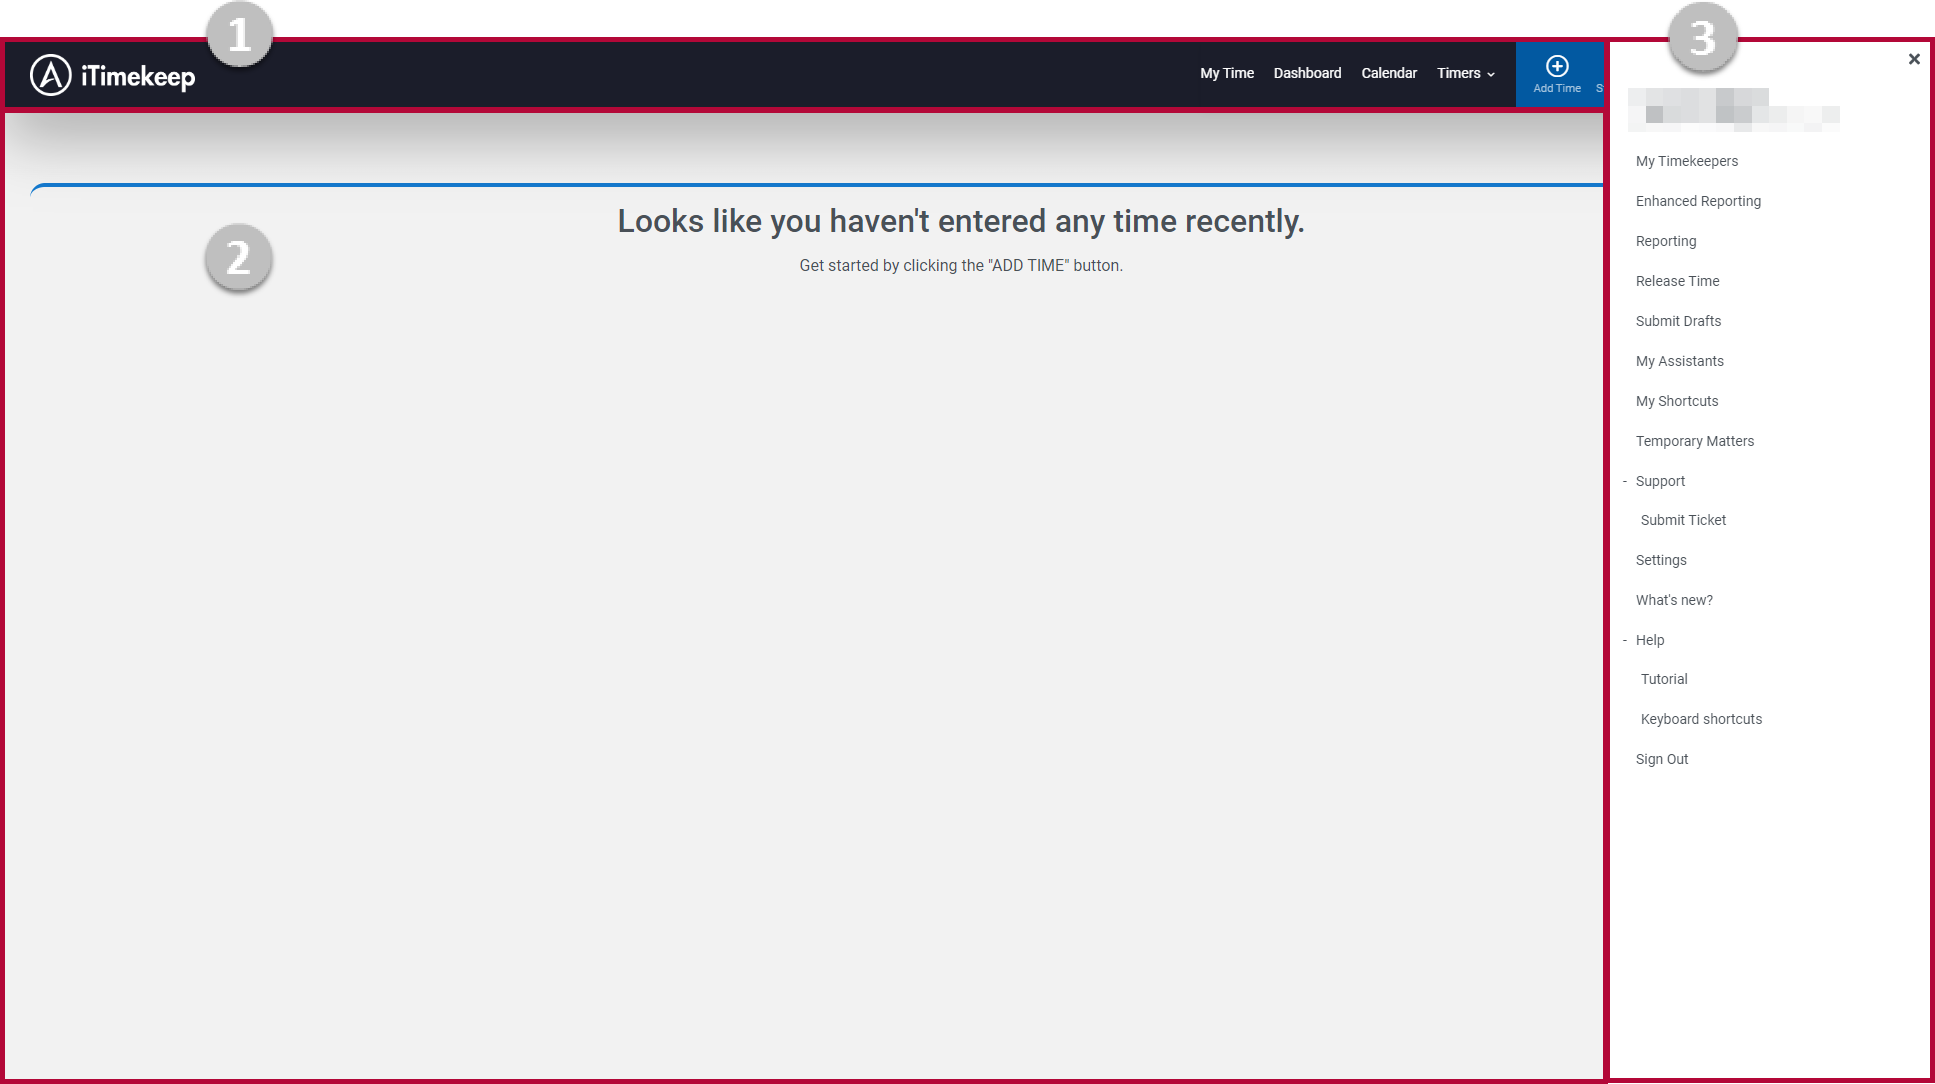
- 1 – Navigation Bar
- The navigation bar facilitates movement through iTimekeep. Options on the navigation bar will typically open as new screens that replace the currently-viewed screen. For more information, see User Interface – Navigation Bar.
- 2 – Main Screen
- The main screen of the iTimekeep user interface is where screens available on the navigation bar will open. In the above screenshot, the My Time screen is open.
- 3 – Menu
- The menu is opened by clicking the
 icon on the navigation bar, and provides access to additional functionality available in iTimekeep that typically open as pop-up windows that display over the main screen. For more information, see User Interface – Menu.
Adding Time
To start adding time, click Add Time on the navigation bar:

The Add Time pop-up window will open, where you can fill out time entry information.
For detailed information on adding time, see Adding and Submitting Time Entries.
Recording Time
To start recording time, click Start Timer on the navigation bar:

If you had previously navigated to a different screen prior to clicking Start Timer, you will be returned to the My Time screen where a timer is now running. By default, timers have no associated information. Click on a timer to open the Edit Timer pop-up window, where you can:
- Stop, pause or nudge the timer
- Pin the timer to reuse the matter and description for future time entries
- Enter a description of the work done
- Save the timer as a draft time entry
For more information on editing timers, see Timer Overview and Editing Timer Information.