Creating a Time Entry
To create a time entry for an email or event:
- Click Open iTimekeep on the Outlook ribbon bar. The iTimekeep add-in opens.
- Click the
 button. A new time entry is created.
 - Fill the time entry out with the appropriate details. The time entry is automatically saved as a draft.
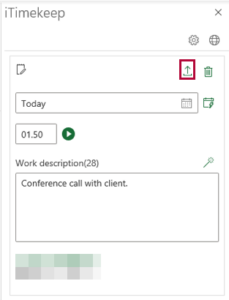
- (Optional) Click the
 icon to submit the time entry.
Timers
Timers can be started from within the Outlook add-in. Click the ![]() button to start the timer, and then either the Pause button to pause the timer, or the Stop button to stop the timer.
button to start the timer, and then either the Pause button to pause the timer, or the Stop button to stop the timer.
Timers can be set to start automatically upon the creation of a timecard. To enable this option, navigate to the add-in settings and toggle Start timer when creating a new item to On.
Autofill Content
Time entry work descriptions can be automatically generated based on the associated email or event data: the sender, recipient and the subject.
To generate a description, click the ![]() icon above the description box:
icon above the description box:

To automatically generate a description for every created time entry without having to click the ![]() icon, navigate to the add-in settings and toggle Automatically suggest work description to On.
icon, navigate to the add-in settings and toggle Automatically suggest work description to On.