The Timers view in the iTimekeep mobile app is a grid, and simplifies organization and interaction with Timers just as it does in the Timer Grid View of iTimekeep Desktop.
Timer Control Basics
Any timecard for the current date has the ability to become a Timer. All the user needs to do is open or create the entry and click the Start Timer button just below the Work Date field. The user can also tap the Start New Timer tile in the mobile Timer view and the new blank Timer will appear.
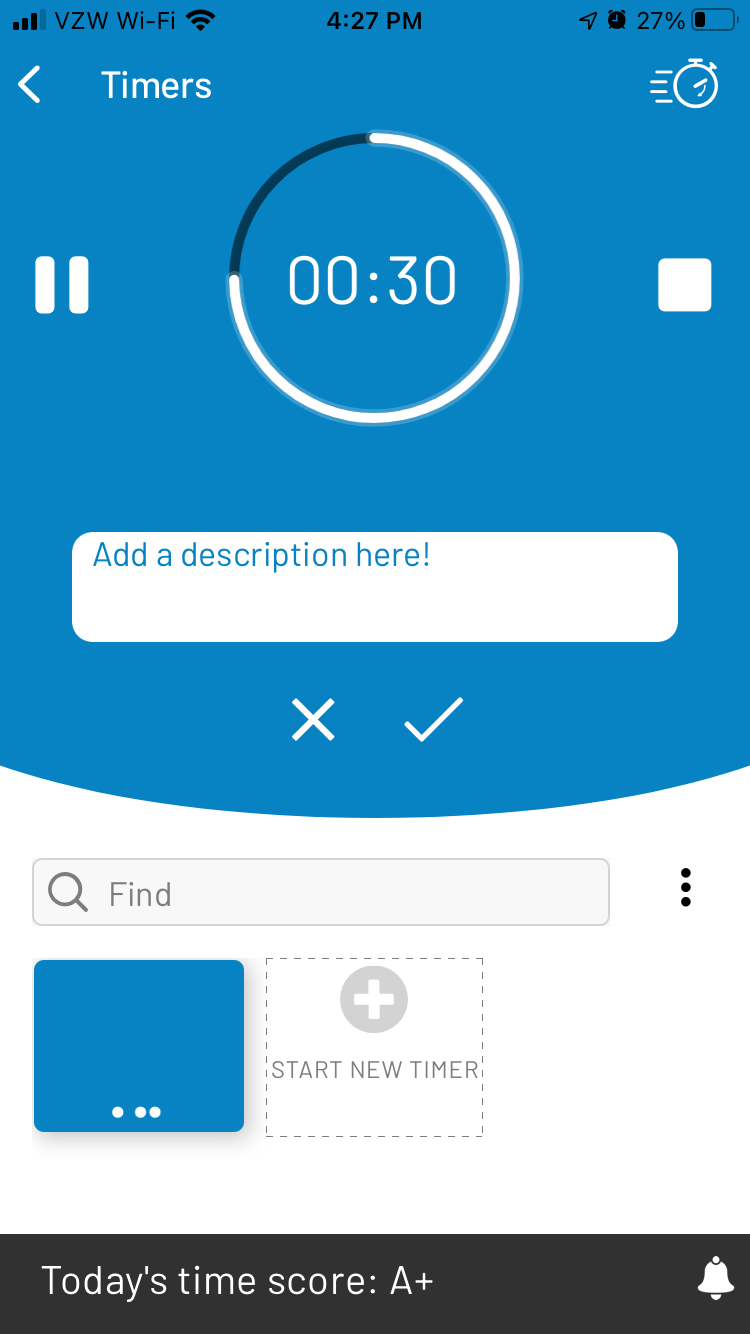
Users may tap on the Timer tile to pause and resume a Timer. The running Timer’s counter will appear at the top of the mobile screen with a Pause/Resume button (parallel lines/triangle) to the left, and an End (square) button to the right.
The End button will deactivate the Timer, remove it from the Timer view, and save the entry as a draft with the hours and minutes converted into the Work Hours of the timecard.
Users may edit the Timer description by dragging it down from the counter at the top of the mobile screen. Tap the Work Description button that appears below the counter, add the description by typing or dictation, and save by tapping the checkmark. Tapping the X will delete the changes to the Work Description field.
Users may also press and hold a Timer tile to open the timecard details where the same Timer controls can be utilized. While viewing the timecard details, tap the Timer counter to view the Timer History, or timestamps of each pause and resume. Take note, once the Timer is ended the Timer History is no longer available to review. Restarting the Timer will start a new Timer History.
Mobile Timer Kebab Menu
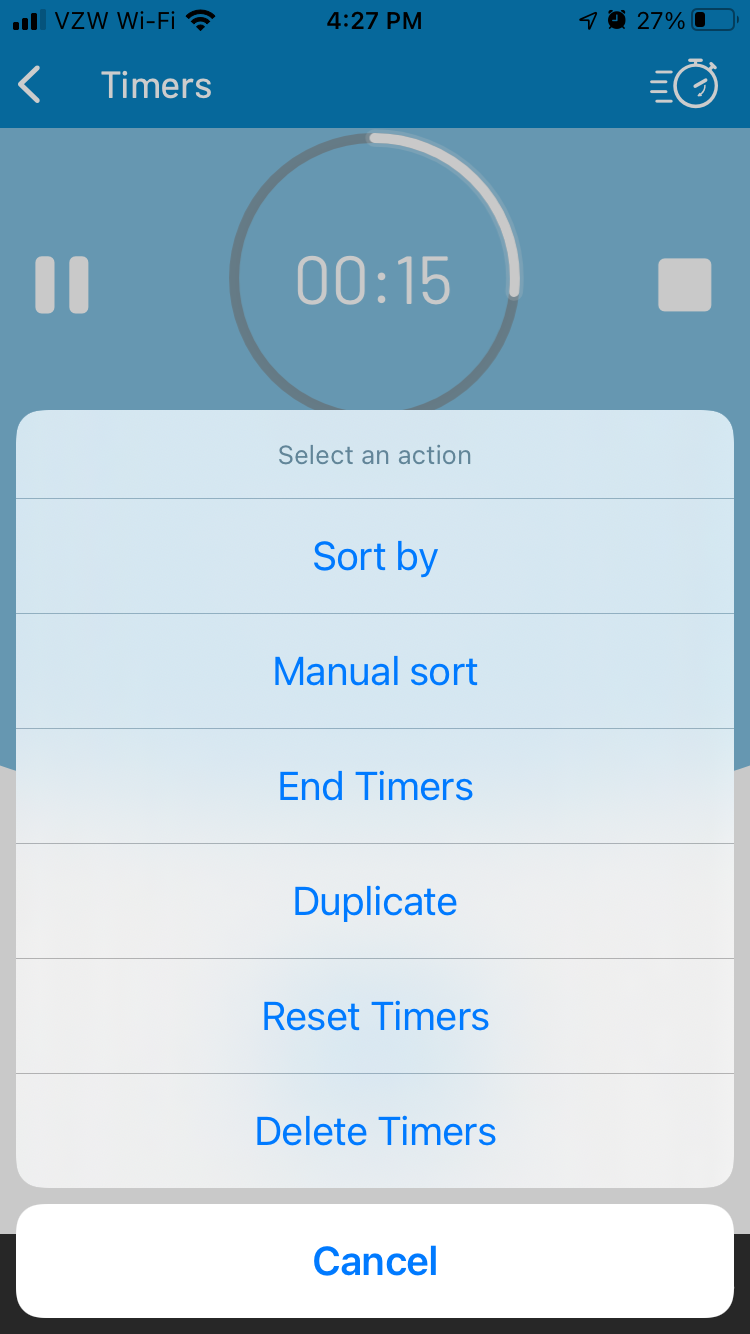
Most of the additional interaction with Timers on the mobile Timer view happens through the Kebab menu (three vertical dots) at the top right of the grid.
The first two options allow the user to sort and rearrange the Timer tiles. See Drag Drop and Rearrange for more details.
The remaining kebab menu options all pertain to bulk manipulation of Timers. Once one of these options is selected, the user will be prompted to select the Timer tiles they wish to affect, and then confirm their selection using the button at the bottom of the screen. These options include:
- End Timers – Ends Timers and saves them as draft timecards
- Duplicate – Creates new Timer entries with the same timecard details, and a counter paused at 0.
- Reset Timers – Sets the selected Timer counters to 0
- Delete Timers – Permanently removes the selected Timers from iTimekeep. Once deleted, these cannot be recovered.
Drag, Drop and Rearrange
From the Timer view kebab menu, select the Sort By option at the top to select a sorting order to your Timers. The sort options are:
- Client Code (ascending)
- Client Code (descending)
- Client Name (ascending)
- Client Name (descending)
- Matter Code (ascending)
- Matter Code (descending)
- Matter Name (ascending)
- Matter Name (descending)
- Recently Created
The second option in the kebab menu, Manual Sort, will allow the user to drag and drop their Timers in any fashion they please. When selected, the Timers will be outlined with a dashed line. To rearrange, the user can press and hold any Timer and drag it to their preferred location in the grid. The other Timer tiles will move out of the way of the Timer being dragged.
Once the Timers are rearranged to the user’s liking, they must select OK at the bottom of the screen to save the new arrangement. Selecting Cancel will revert the Timers to their former positions.”